


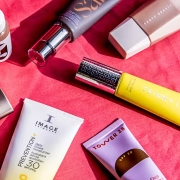
Contouring is one of the most effective ways to sculpt and define the face—especially for those with a round face shape. If you want to create more dimension, enhance your bone structure, and slim down softer facial features, contouring with cream products is the way to go. Creams blend seamlessly into the skin for a natural, skin-like finish and are especially ideal for dry or combination skin.
In this guide, we’ll walk you through how to contour a round face using cream products, step by step, along with helpful tips, tools, and budget options for flawless results.
Why Choose Cream Products for Contouring?
Cream products offer several advantages over powders, especially for round faces:
- Better blendability: Creams melt into the skin for a seamless finish.
- Natural look: They mimic the texture of skin, avoiding a cakey or powdery appearance.
- Buildable: You can start sheer and intensify the contour as needed.
- Long-lasting: When set properly, cream products stay put throughout the day.
Understanding a Round Face Shape
Before you start contouring, it’s important to understand the unique features of a round face. Key characteristics include:
- Soft, curved lines with minimal angles
- Full cheeks
- Equal width and length of the face
- Less-defined jawline and cheekbones
The goal of contouring a round face is to create the illusion of more definition and angles—especially around the cheeks, temples, and jaw.
Step-by-Step: How to Contour a Round Face Using Cream Products
Step 1: Prep the Skin
Start with a clean, moisturized face. Apply a lightweight primer to ensure the cream products glide on smoothly and stay in place.
Optional: If you’re a student or on a budget, there are many Budget-Friendly Makeup Products for College Students that include quality primers, cream contour sticks, and setting sprays.
Step 2: Apply Foundation
Use a foundation that matches your skin tone to create an even base. Apply with a damp sponge or brush and blend well.
Tip: Avoid full-coverage foundation if you prefer a natural, everyday look. Choose buildable formulas that allow your skin to breathe.
Step 3: Map Out the Contour
Use a cream contour stick, pot, or palette that is 1–2 shades darker than your skin tone. Focus on the following areas:
- Temples and forehead sides: Apply along the edges to create the illusion of a narrower forehead.
- Hollows of the cheeks: Suck in your cheeks and draw a line from mid-ear toward the corner of your mouth, stopping under your cheekbone.
- Jawline: Trace along the jaw, blending downward to create more definition and reduce fullness.
- Sides of the nose (optional): Slim the nose by applying contour down each side and blending well.
Step 4: Highlight Strategically
Use a cream highlighter or concealer that’s 1–2 shades lighter than your skin tone to bring light to the center of your face:
- Center of the forehead
- Under the eyes in a triangle shape
- Down the bridge of the nose
- Center of the chin
This contrast between light and dark creates dimension and draws attention to the center of your face.
Step 5: Blend Everything
Blending is key to avoiding harsh lines. Use a damp makeup sponge or dense buffing brush to blend the contour and highlight:
- Blend upwards on the cheeks to lift the face.
- Use patting motions rather than dragging to maintain product placement.
- Blend into the hairline for a natural finish.
Step 6: Set with Powder (Optional)
If you have oily skin or want long wear, lightly set your cream contour with a translucent or matching powder.
Use a fluffy brush to avoid disturbing the cream underneath. You can also add a light layer of bronzer to intensify the contour if desired.
Recommended Cream Contour Tools & Products
| Product Type | Recommended Tool | Affordable Option? |
|---|---|---|
| Cream contour stick | Contour brush / sponge | Yes – drugstore brands |
| Cream highlighter | Small concealer sponge | Yes – student-friendly kits |
| Blending brush/sponge | Damp beauty sponge | Yes – reusable multi-packs |
| Setting spray | Fine mist spray bottle | Yes – budget setting mists |
Tips for Beginners with Round Faces
- Avoid placing contour too low. Always blend upward to lift the face rather than drag it down.
- Use cream blush on the upper cheekbones to elongate the face.
- Stick with matte creams for contouring to avoid drawing attention to the width of the face.
- Don’t skip highlighting. Contour without highlight can make the face appear muddy.
- Start light. Build up color slowly to avoid harsh lines.
FAQs: Cream Contouring for Round Faces
Q1: Is cream contour better than powder?
For round faces, yes. Cream contour blends more naturally and allows you to sculpt softer features without harsh lines. It’s also better for dry or combination skin types.
Q2: How do I choose the right shade for contour?
Choose a contour shade that is 1–2 shades darker than your skin tone with a cool or neutral undertone to mimic shadows.
Q3: Can I contour a round face every day?
Yes. For everyday wear, opt for light contouring using cream products and blend well for a subtle, sculpted look.
Q4: How long does cream contour last?
When set with powder and finished with a setting spray, cream contour can last 6–10 hours depending on your skin type and activity.
Q5: What’s a good budget-friendly cream contour for beginners?
Look for stick or palette-based cream contours from drugstore brands. Many Budget-Friendly Makeup Products for College Students include full face kits with contour, blush, and highlight at affordable prices.
Final Thoughts
Contouring a round face using cream products is all about placement, blending, and contrast. By focusing on the outer edges of the face and highlighting the center, you can create the illusion of sculpted cheekbones, a slimmer jawline, and a more defined profile.
Whether you’re getting ready for a night out or just want to elevate your daily makeup routine, mastering cream contouring can completely transform your look. And the best part? You don’t need luxury brands to do it. Many of the Budget-Friendly Makeup Products for College Students available today offer quality formulas that work just as well for a fraction of the cost.
With practice and the right tools, contouring can become a quick and natural part of your beauty routine—helping you enhance your features while staying confident and camera-ready.