

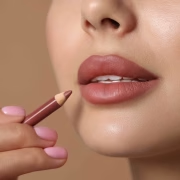


False eyelashes can instantly enhance your eyes, making them look bigger, fuller, and more defined. Whether you’re preparing for a wedding, party, photoshoot, or simply want a glam look, learning how to apply false eyelashes step by step will help you achieve flawless results without frustration.
If you’re new to lash application, don’t worry. This complete guide breaks everything down into simple, easy-to-follow steps so you can apply lashes confidently and comfortably.
Why False Eyelashes Make a Difference
False lashes:
- Add volume and length
- Enhance eye shape
- Make makeup look more polished
- Create a dramatic or natural effect depending on style
When applied correctly, they blend seamlessly with your natural lashes and feel lightweight.
Tools You’ll Need
Before starting, gather the essentials:
- False eyelashes
- Lash adhesive (clear or black)
- Tweezers or lash applicator
- Small scissors
- Mirror
- Eyeliner
- Mascara
Having everything ready makes the process smooth and stress-free.
How to Apply False Eyelashes Step by Step
Step 1: Measure and Trim the Lashes
This is the most important step many beginners skip.
- Remove the lash from its tray gently.
- Place it along your lash line (without glue).
- Check if it’s too long for your eye.
- Trim from the outer edge only if needed.
Proper sizing ensures comfort and prevents lifting at the corners.
Step 2: Curl Your Natural Lashes
Use an eyelash curler to lift your natural lashes. This helps them blend better with the false ones.
You can also apply a light coat of mascara at this stage.
Step 3: Apply Eyeliner
A thin line of eyeliner along your upper lash line helps:
- Hide the lash band
- Make lashes look more natural
- Fill gaps between natural and false lashes
Black liner works best for dramatic looks, while brown offers a softer finish.
Step 4: Apply Lash Glue Correctly
Apply a thin layer of adhesive along the lash band.
Important tips:
- Don’t overload with glue
- Wait 20–30 seconds for it to become tacky
- Blow gently to speed up drying
Tacky glue sticks better than wet glue.
Step 5: Position the Lash
Using tweezers or your fingers:
- Look slightly downward into a mirror
- Place the lash in the center of your lash line first
- Adjust the inner and outer corners
Press gently along the band to secure it.
Step 6: Blend and Finish
Once secure:
- Press your natural and false lashes together gently
- Apply a thin coat of mascara if needed
- Touch up eyeliner to hide any visible gaps
Your lashes should now look seamless and lifted.
Common Mistakes to Avoid
- Skipping the trimming step
- Using too much glue
- Not waiting for glue to get tacky
- Placing lashes too high above the lash line
- Forgetting to blend with eyeliner
Avoiding these mistakes makes application much easier.
Types of False Eyelashes
| Type | Best For | Difficulty Level |
|---|---|---|
| Strip Lashes | Full glam look | Beginner-friendly |
| Individual Lashes | Custom volume | Intermediate |
| Magnetic Lashes | No glue needed | Beginner |
| Cluster Lashes | Dramatic look | Intermediate |
Strip lashes are ideal for beginners learning how to apply false eyelashes step by step.
How to Remove False Eyelashes Safely
Removing lashes properly prevents damage:
- Gently peel from the outer corner inward.
- Remove leftover glue from the band.
- Clean with micellar water if needed.
- Store back in the original case.
Never pull aggressively, as this can damage natural lashes.
How to Make False Lashes Last Longer
- Remove glue residue after each use
- Store properly in a case
- Avoid soaking in water
- Handle gently
High-quality lashes can be reused 10–15 times with proper care.
Tips for Different Eye Shapes
Round Eyes
Choose lashes that are longer at the outer corners to elongate.
Hooded Eyes
Go for lightweight, wispy lashes to avoid heaviness.
Almond Eyes
Most lash styles suit this eye shape.
Small Eyes
Trim lashes slightly shorter for a natural look.
Pairing Lashes with Makeup
False lashes look best when paired with:
- Well-blended eyeshadow
- Defined brows
- Smooth base makeup
Good skin preparation is essential for any makeup look. Following a proper Skincare Routine for Women Over 40 or any age-appropriate skincare routine ensures your makeup sits smoothly and lasts longer.
Beginner Practice Tips
- Practice without glue first
- Start with natural-looking lashes
- Apply in good lighting
- Be patient
Like any beauty skill, applying false lashes gets easier with practice.
FAQs About How to Apply False Eyelashes Step by Step
1. How long do false eyelashes stay on?
With proper glue, strip lashes can last 6–10 hours.
2. Can I apply lashes without eyeliner?
Yes, but eyeliner helps hide the lash band for a seamless finish.
3. Are false lashes safe for daily use?
Occasional use is safe if applied and removed gently.
4. Can beginners use magnetic lashes?
Yes, magnetic lashes are easier since they don’t require glue.
5. Why do my lashes lift at the corners?
They may be too long or you didn’t wait long enough for the glue to become tacky.
Final Thoughts
Learning how to apply false eyelashes step by step may seem intimidating at first, but with the right tools and techniques, it becomes quick and easy. The key steps are measuring, trimming, waiting for glue to get tacky, and blending properly.